1. Introduction to Computer Vision
1.1. Computer Vision
1.2. Computer Vision Capabilities
1.3. What Computer Vision is used for?
2. Installation of OpenCV with CUDA GPU support
2.1. Why GPU support?
2.2. Installation of required driver and programs
2.2.1. Graphics Card Driver Installation
2.2.2. Visual Studio IDE Installation
2.2.3. CUDA and cuDNN Installation
2.2.4. CMake Installation
2.2.5. OpenCV Installation
4. Conclusion
1. Introduction to Computer Vision
1.1. Computer Vision
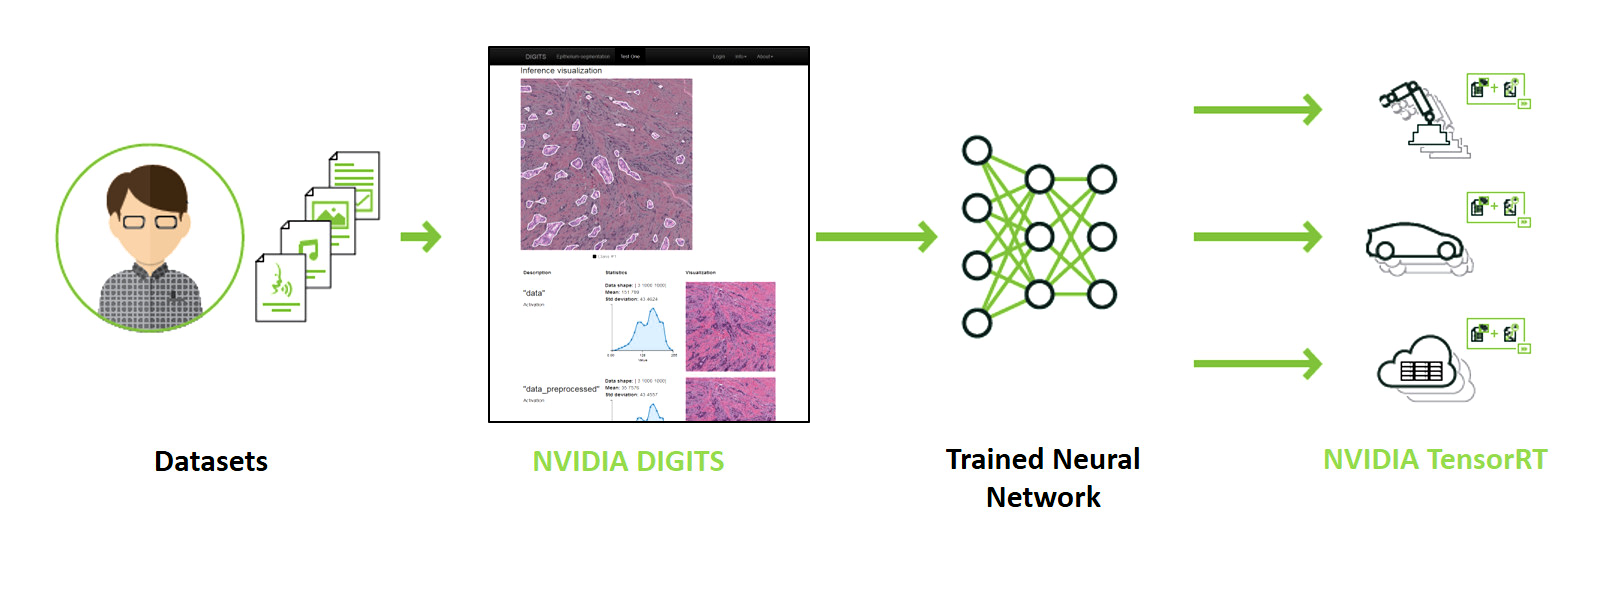
Computer vision is a field of computer science that focuses on enabling computers to identify and understand objects and people in images and videos. As a sub-group of artificial intelligence (AI) and deep learning, computer vision trains convolutional neural networks (CNNs) to develop human vision capabilities for applications. Computer vision can include specific training of CNNs for segmentation, classification, and detection using images and videos for data.
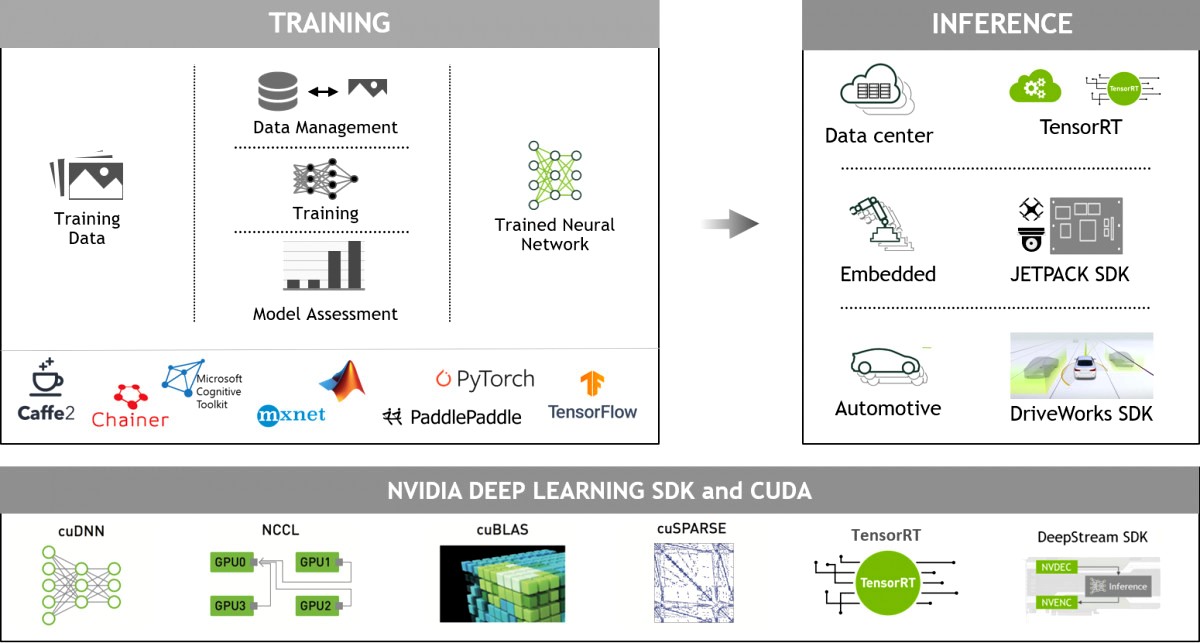
Computer Vision Flow
1.2. Computer Vision Capabilities
Convolutional neural networks (CNN) can perform segmentation, classification, and detection for a myriad of applications:
- Segmentation: Image segmentation is about classifying pixels to belong to a certain category, such as a car, road, or pedestrian. It’s widely used in self-driving vehicle applications to show roads, cars, and people. Think of it as a visualization technique that makes what computers do easier to understand for humans.
- Classification: Image classification is used to determine what’s in an image. Neural networks can be trained to identify dogs or cats, for example, or many other things with a high degree of precision.
- Detection: Image detection allows computers to localize where objects exist. In many applications, the CNN puts rectangular bounding boxes around the region of interest that fully contain the object. A detector might also be trained to see where cars or people are within an image.
| Segmentation | Classification | Detection |
|---|---|---|
| Good at delineating objects | Is it a cat or a dog? | Where does it exist in space? |
| Used in self-driving vehicles | Classifies with precision | Recognizes things for safety |
1.3. What Computer Vision is used for?
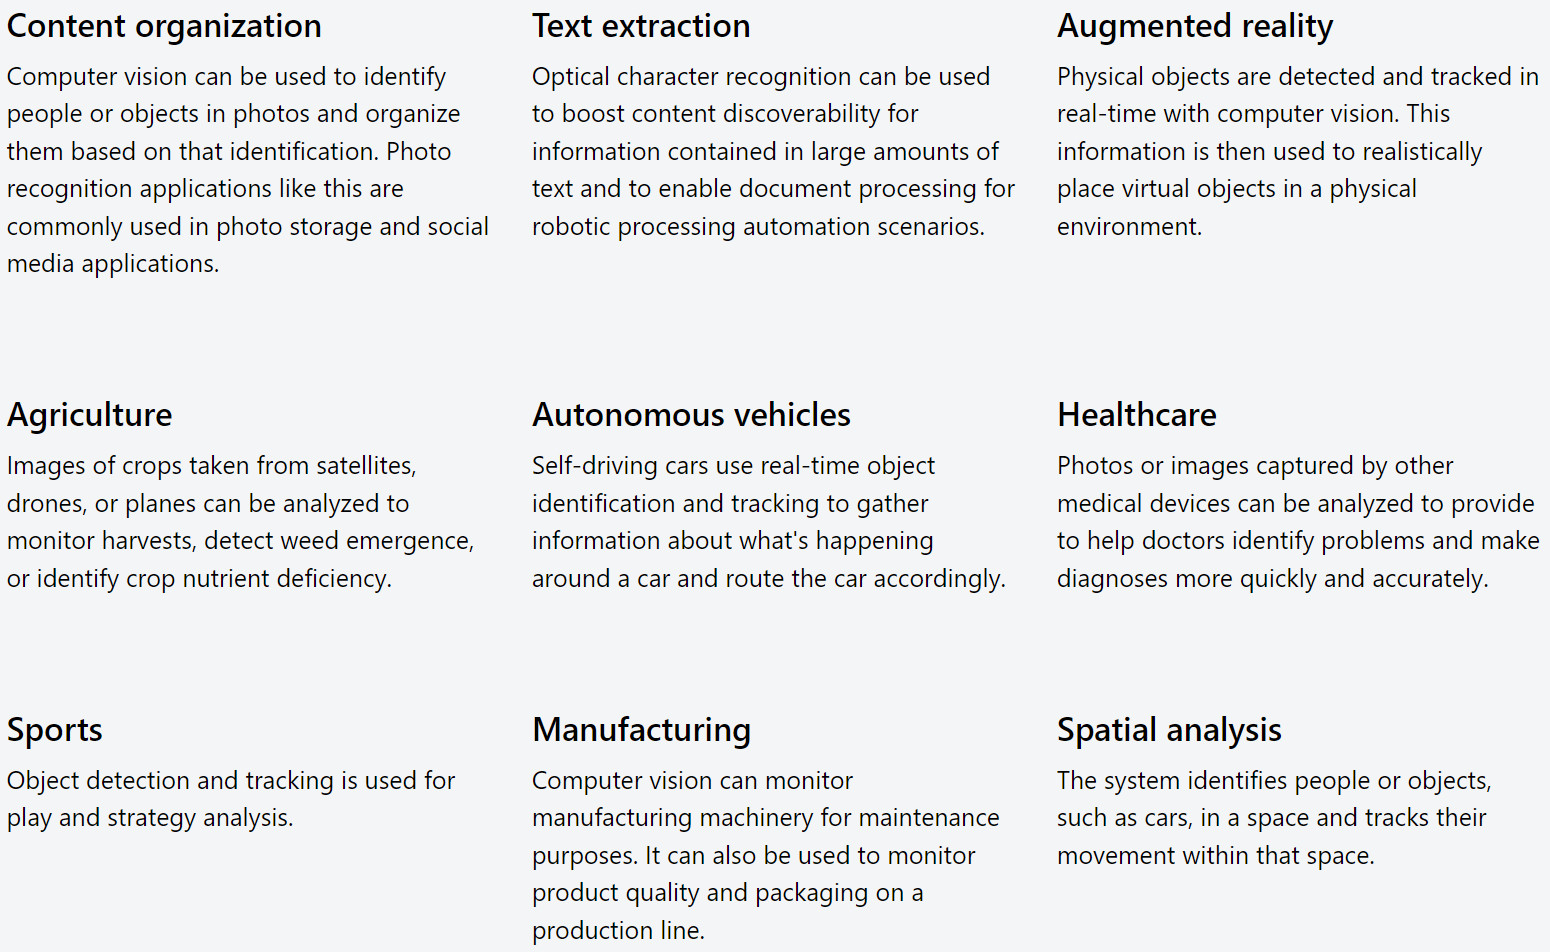
Computer vision is a powerful capability and it can be combined with many types of applications and sensing devices to support many practical use cases. Here are just a few different types of computer vision applications
2. Installation of OpenCV with CUDA GPU support
2.1. Why GPU support?
In modern computing, new algorithms and diverse data types, such as 4K images, have become commonplace, necessitating increased computing power to leverage these advancements
Graphics Processing Units (GPU) are devices with high potential to provide enormous computing power for general-purpose computing since they have hundreds of processing units inside. Especially, image processing and computer vision applications are where the GPUs shine. NVIDIA’s CUDA is the most common APIs that provide an interface to run parallel programs on GPU. Generally, writing code that will run on GPU by using those APIs involves lower-level programming concepts such as memory allocation and thread synchronization.
2.2. Installation of required Driver and Programs
2.2.1. Graphics Card Driver Installation
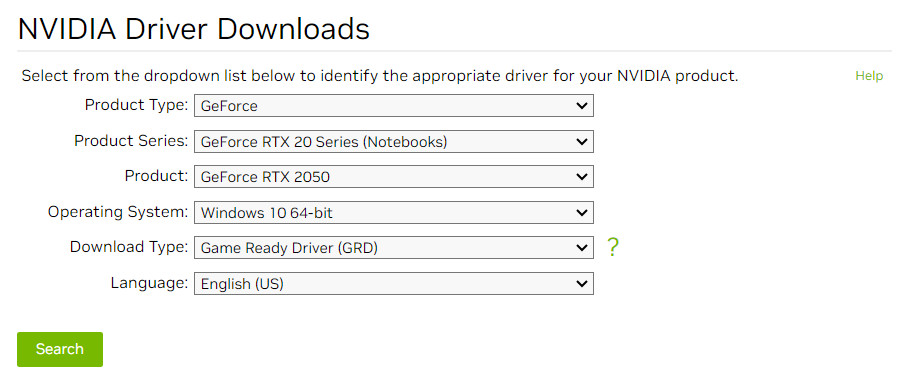
You can select the graphics card that you own and download the drivers from this link. Just download the executable file and run it to install the driver.
2.2.2. Visual Studio IDE Installation
We will use Visual Studio Community as an IDE. It is free and it provides lots of useful tools. You can download it from this link.
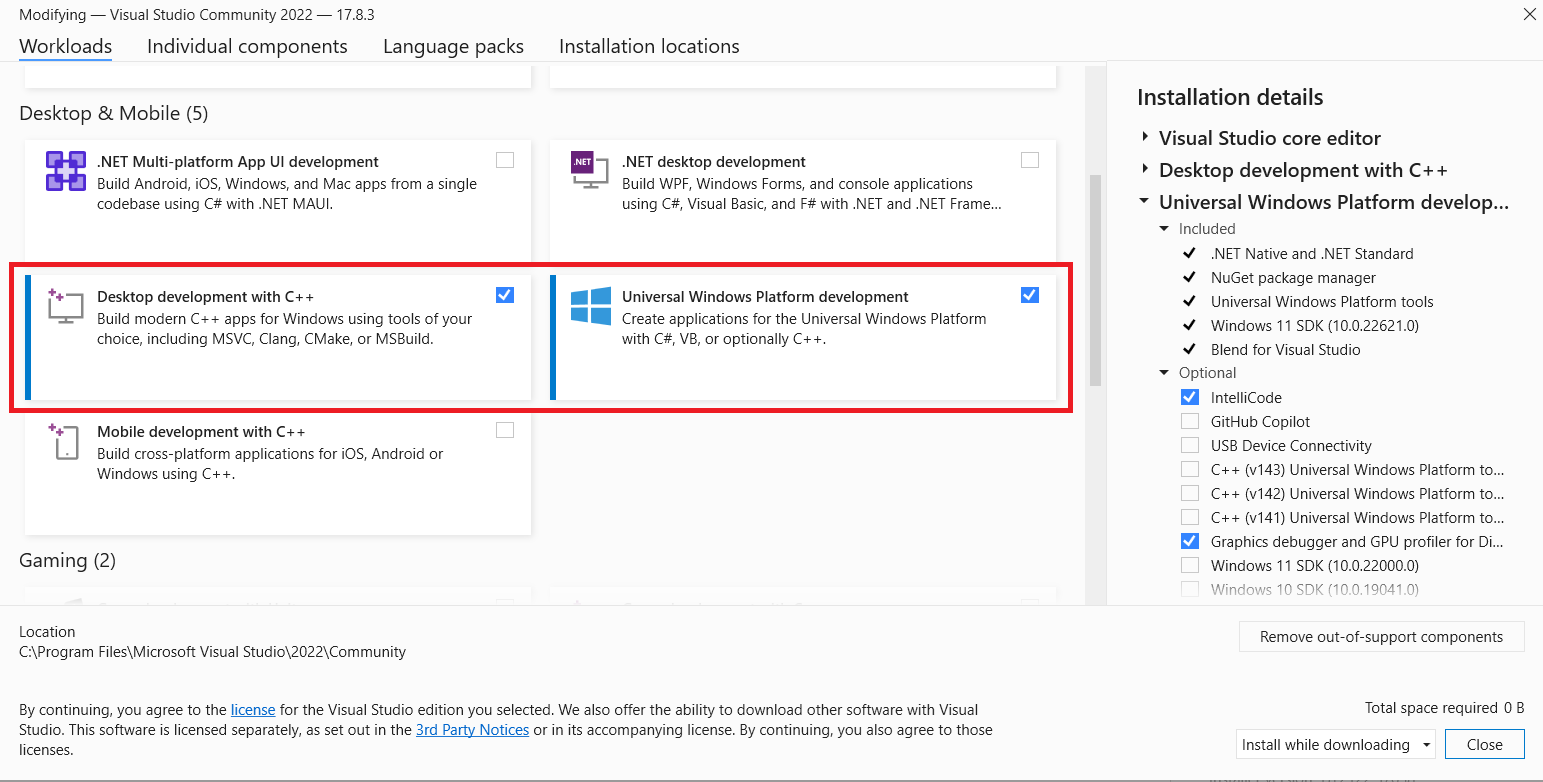
An installation menu that will allow you to select which components to install will appear. You need to select the components we need for C++ development.
2.2.3. CUDA and cuDNN Installation
You can download the CUDA executable file from this link, ensuring it matches your system requirements. Just download the executable file and run it to install the CUDA Toolkit.

Download cuDNN from here
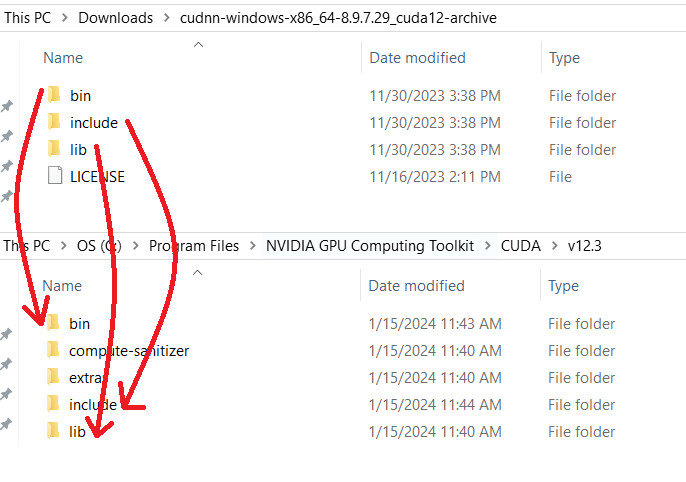
Extract the cuDNN package.
Copy the contents of each folder into corresponding folders at the CUDA folder respectively.
Check whether the CUDA Toolkit folder has been added to the path or not

2.2.4. CMake Installation
You can download the CMake from this link. Just download the executable file and run it to install the CMake.
2.2.5. OpenCV Installation
Download the OpenCV and the extra modules that contain the GPU module from here
After the downloads are complete, extract those two files into a proper directory which we will use for the next steps.
- Start CMake, copy, and paste the path of the OpenCV folder. Do the same thing for the path that you want to extract the compiled library.

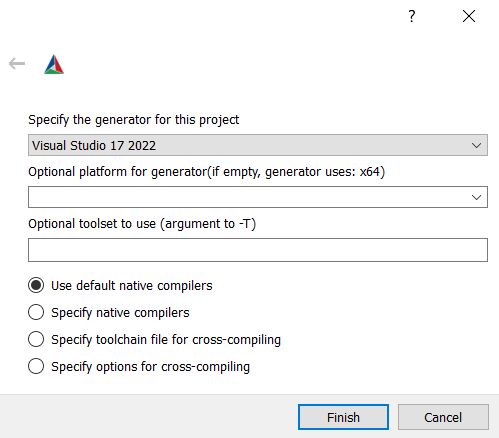
- Press Configure to continue. Select the proper Visual Studio version, then press Finish.
- You will see a window that shows some options and status. Let’s find and configure some options like the below configuration

- Press the Configure button.
- Continue to activate the CUDA_FAST_MATH option.

- For the final step, click the Configure button and then the Generate button. If there weren’t any errors, you’ll see a message similar to the one below. Now you can exit the CMake and proceed to the next step.

- Head to the directory where your compiled files are located and open the OpenCV.sln with Visual Studio.
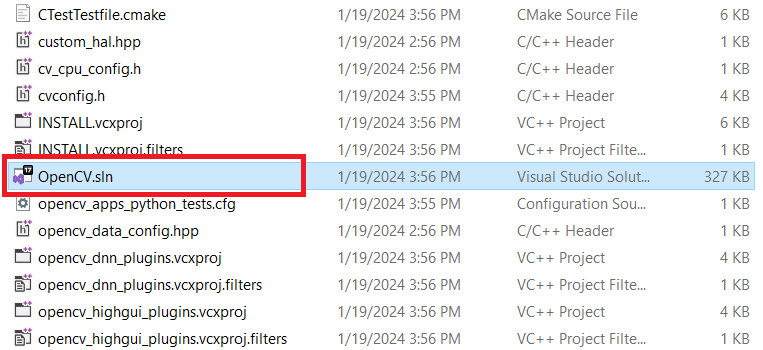
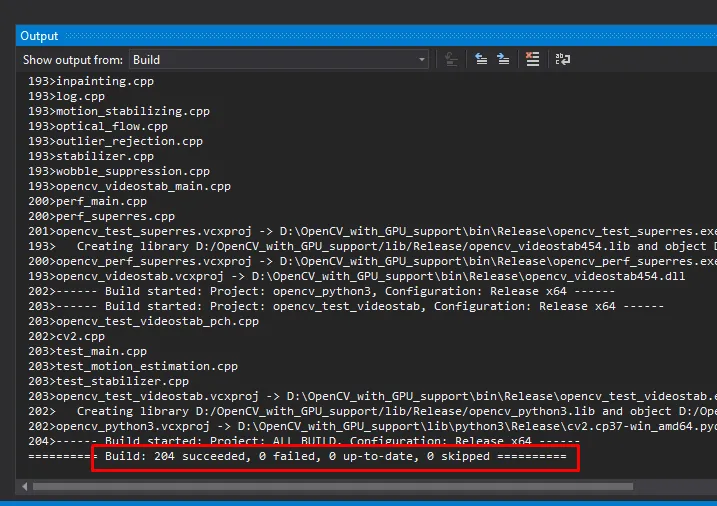
- Expand the CMakeTargets folder at the Solution Explorer menu and select the ALL_BUILD option. Right-click to ALL_BUILD and then click Build.

If there is no error, you’ll get a message similar to the one below.
- Similarly, for the INSTALL option in the CMakeTargets folder.
- In the final step, let’s add the paths of the lib and bin folders to the system variable

4. Conclusion
The installation process of OpenCV with GPU support is now completed. In the next article, we will be setting up our Visual Studio environment to use OpenCV in our Computer Vision projects. If you encounter any issues, don’t hesitate to contact us at [email protected]


